How I Order Kennametal End Mills and Hydraulic Tool Holders: The Buyer’s Checklist
-
Step 1: Get the full part number before you ask for price
-
Step 2: Confirm how the end mill will actually be held in the machine
-
Step 3: Match the tool and coating to the actual workpiece material
-
Step 4: Qualify a CNC precision turning manufacturer the same way you qualify a tooling supplier
-
Step 5: Place a small order first. It is not an insult—it is an audit.
-
Step 6: Agree on lead time, marking, and paperwork before you send the PO
-
Step 7: Inspect on arrival and save the certificates
-
The two notes I keep attached to this checklist
I handle purchasing for a small contract machining shop. I don’t run the CNC machines—my job is to make sure the right tools show up before a job starts. That’s roughly $150,000 in annual spend across eight or nine vendors, and I report to the shop manager and to finance. I’m not the machinist, so this checklist is written for the person in the office, not for someone standing at a spindle.
I buy a fair amount of Kennametal tooling, especially end mills, inserts, and hydraulic tool holders. The products are dependable. The buying process is not always. If you’re an engineer, a new buyer, or an office person who just inherited purchasing, here is the seven-step checklist I use. It is deliberately repetitive—the repetition is what catches the expensive mistakes.
Step 1: Get the full part number before you ask for price
“Kennametal end mills” is a product family, not a specification. In my first year, I made the classic buyer’s error: I ordered a “1/2-inch end mill” without checking whether the drawing called for a 1/2-inch shank or a 1/2-inch cutting diameter. The machinist saw the PO and laughed. Not the good laugh.
Now I refuse to ask for pricing until someone on the shop floor gives me the complete catalog description: shank diameter, cutting diameter, length of cut, overall length, number of flutes, corner radius, and coating. If the tool is for a specific job, I also ask what material it will cut. That one sentence has eliminated more wrong orders than anything else I do.
Step 2: Confirm how the end mill will actually be held in the machine
Kennametal hydraulic tool holders are a common choice in our shop because they reduce runout and dampen vibration. But hydraulic holders are not forgiving when you guess dimensions. A 12 mm shank will not fit in a 1/2-inch holder, even though they look almost the same on paper. I learned that from an email I do not want to repeat.
Before I put a hydraulic tool holder on a PO, I confirm the machine taper, the gripping diameter, the reach or gage length, and whether the job needs coolant-through. I also double-check that the end mill’s shank tolerance is compatible with the holder. If you are not sure, ask the tooling distributor to verify it in writing. A distributor who avoids giving written confirmation is a distributor I do not use twice.
Step 3: Match the tool and coating to the actual workpiece material
The label on the box matters less than the material you are cutting. Aluminum tooling, steel tooling, and titanium tooling are not interchangeable just because they share the same brand name. When we run small titanium instruments—think of a body jewelry ball holder/removal tool, which is a tiny threaded part that has to be cut cleanly and passivated—I do not assume a general-purpose end mill is good enough.
That kind of job needs the right geometry, the right edge preparation, and the right coating. If I am not sure, I ask the machinist to name the specific Kennametal series or coating they want. Then I order exactly that. It is easier to argue with a request than to explain why I substituted a cheaper tool without asking.
Step 4: Qualify a CNC precision turning manufacturer the same way you qualify a tooling supplier
Not every job is milling. When we need a made-to-print turned part, I look for a CNC precision turning manufacturer that can prove its process. The phrase “precision turning” is used loosely, so I keep the qualification checklist short.
I ask what machines the job will run on, what tolerances they hold routinely, and whether they provide material certs and inspection reports. I also ask how they handle a first order under 100 pieces. A shop that treats a small trial run seriously is usually a shop that treats the final production run seriously. We have ordered everything from valve components to specialized body jewelry removal tools from precision turning shops, and the qualification steps are identical.
Step 5: Place a small order first. It is not an insult—it is an audit.
I know why purchasing people avoid small orders. They are slower, the per-piece price is higher, and they create extra paperwork. But a small order is the fastest way to see how a supplier actually behaves.
I remember one vendor who quoted a good price on a batch of tooling but was not interested in helping us with a two-piece trial. We went with a different supplier who treated the trial order like a real job. That supplier still gets our business today. In my experience, a vendor that dismisses a $300 order will not magically become responsive when the order is $30,000.
Step 6: Agree on lead time, marking, and paperwork before you send the PO
This is the step I wish I had learned earlier. On a custom turned part, we often need marking for traceability. It sounds simple until you ask the supplier what type of laser they have and they respond with a vague “we can mark it.” I have seen more than one quote fall apart at that point.
For example, a common question is how many sessions of CO2 laser are needed to produce a readable mark on anodized aluminum or coated parts. The honest answer is that it depends on the material, the laser power, and the contrast you want; one session is sometimes enough, and two may be needed for a darker mark. On bare steel or carbide, a CO2 laser is usually the wrong answer—a fiber laser is better. If a supplier cannot explain that difference before taking your money, your parts will be the place where they learn.
I also ask for a proforma invoice or written confirmation that shows the part number, quantity, price, lead time, and shipping method. One vendor could not provide a proper line-item invoice after we sent the PO. Finance rejected the payment, the shipment got delayed, and I spent two weeks explaining to my manager what happened. Now I verify the paperwork capability before I verify the price.
Step 7: Inspect on arrival and save the certificates
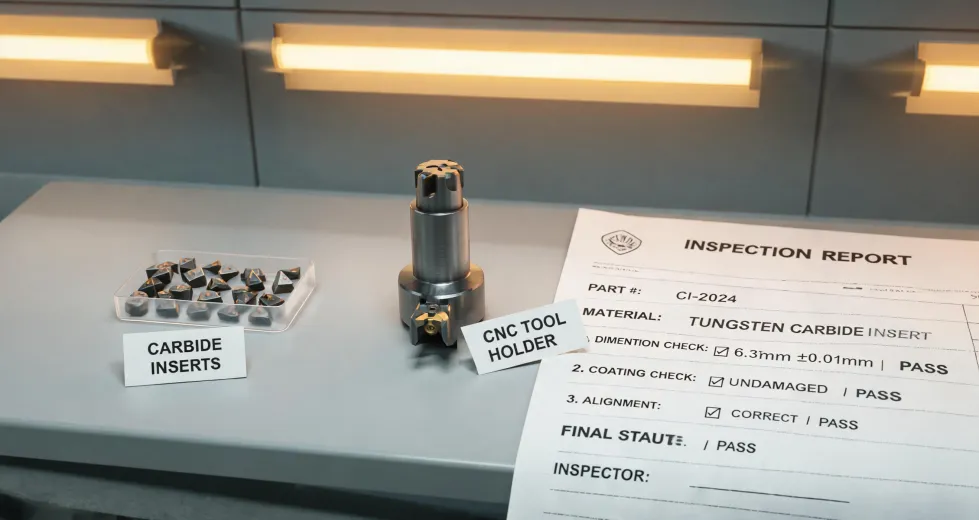
When the box arrives, I do not just sign the delivery receipt and put the order on the shelf. I open the packaging, confirm the part numbers match the PO, and check for obvious damage or shipping wear. With hydraulic tool holders, I keep the inspection or test documentation that comes in the box. With precision turned parts, I file the material cert and the inspection report before the parts move to the shop floor.
Green packaging claims are another thing I look at. If a supplier says their packaging is recyclable or eco-friendly, I ask what makes it so. According to the FTC Green Guides (16 CFR Part 260, ftc.gov/green-guides), environmental marketing claims should be substantiated. My rule is simpler: if a supplier gives vague answers about something as basic as packaging, I assume their quality documents will also be vague until proven otherwise.
The two notes I keep attached to this checklist
First, I don’t have hard data on how many purchase orders go wrong industry-wide. I only know our internal numbers-anecdotally, the bulk of our mistakes came from incomplete specifications and unverified supplier claims. Both were avoidable, and both were my responsibility.
Second, don’t be afraid to sound like you don’t know something. I’ve asked tooling suppliers questions that probably sounded basic. The good ones explain without making me feel small. The ones that roll their eyes are the ones I stop calling. There is a difference between buying a tool and buying a tooling partner, and that difference shows up fastest when you admit what you don’t know.